
The other day I was digging through my closet looking for clothes to donate when I came across an old relic of my school uniform. Back then, my mum always bought my clothes two or three sizes larger in the hopes I would "grow into" them. Being an angsty teen, I immediately rebelled and ceased growing (ok, I actually didn't have a choice in the matter) so that means I'm left with a lot of ill-fitting shirts that sit like tents on me. Yeah... not so flattering.

Of course, I jumped straight onto the interwebs to look for inspiration, and I found this:
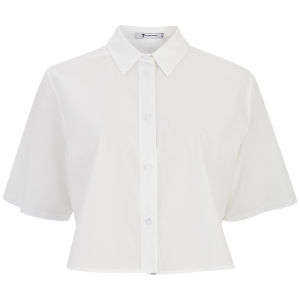 |
| Source: Alexander Wang |
I love clean white lines, and the boxy fit of this shirt matched mine perfectly. So I got a-cuttin'!
What you'll need:
- White button up
- Scissors
- Matching thread and needle
- Ruler
- Chalk


2. I wanted a slightly curved back rather than a straight back, so I marked where I wanted the lowest point and drew a gentle curve joining with the line at the front.

3. Whip out your scissors and start cutting! I cut 1.5 cm below the lines I drew so I could hem it up.

Once you're done, simply hem and wash off the chalk, and you're ready to go!


Easiest DIY ever! Now all I have to work on are my (sadly non-existent) abs.
Let me know what you think of this DIY in the comments below!
Follow my blog with Bloglovin
No comments:
Post a Comment